how to draw a 3d box in indesign
Create a cube desk calendar with InDesign

In this tutorial I'm going to create a cube net utilising some of the great functions in InDesign, including smart guides, X and Y positioning, and the height and width text fields. The usual choice for vector graphics work would be Illustrator, but for me it's faster to piece of work in InDesign – the programme has many of the aforementioned functions as Illustrator, so information technology tin can easily be used to create simple vector-based graphics.
You can always lay out the cube net in InDesign and salvage it equally a PDF to import into Illustrator to finish.
For this tutorial, it'll be useful to be able to spread your piece of work over multiple pages. Also, make sure your smart guides are turned on. They are establish under View>Grids and Guides>Smart Guides, and help with aligning the squares of your map.
Step 01
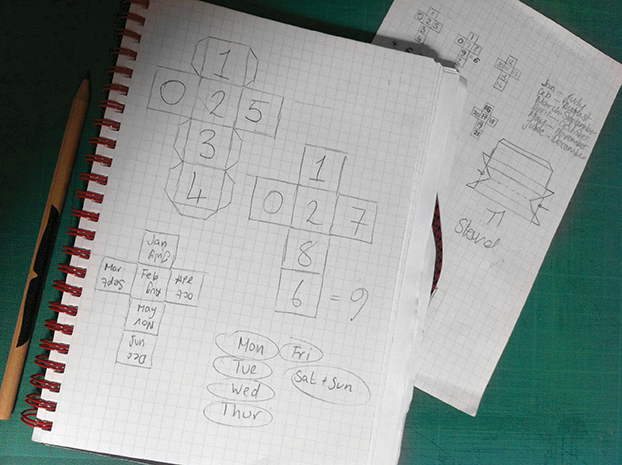
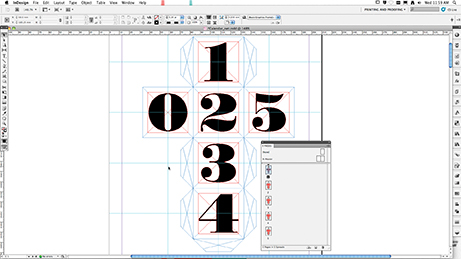
Accept some fourth dimension to programme your calendar: yous'll demand to work out how many cubes you need and what will keep each face of each i. I'm going to work with iv cubes – ane for the days of the week, 2 for the engagement and i for the calendar month. This can exist done by doubling up some of the data on the calendar week and month cubes.
Step 02
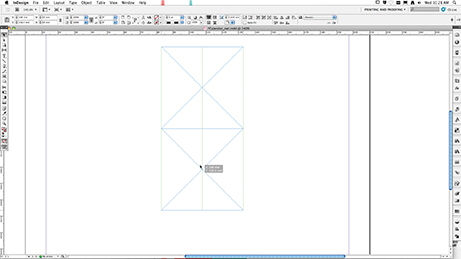
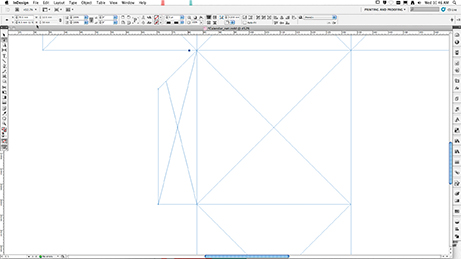
In a new certificate, select the Rectangle tool and double-click on the folio to open the Rectangle panel. Enter your cube face measurement in the field: I'm creating mine at 50mm foursquare. Using the Pick tool, hit Cmd/Ctrl+Opt/Alt+Shift and indistinguishable the paradigm frame, then drag the frame into position.
The smart guides volition prove you when the frames are lined upwardly, and then duplicate the boxes until yous have six faces to match your plan.
Step 03
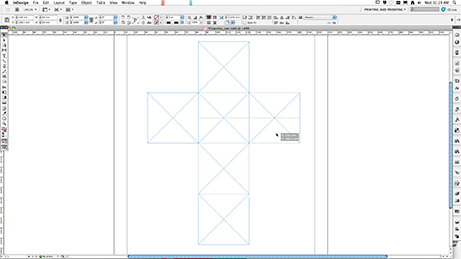
To create the tabs on the net, indistinguishable one of the frames and align it to the left side of the net.

Select the central-right option from the Reference Point tool in the Application bar, and using the width measurement fields, reduce the size of the box by 4 past adding /4 to the end of the measurement value.
Step 04
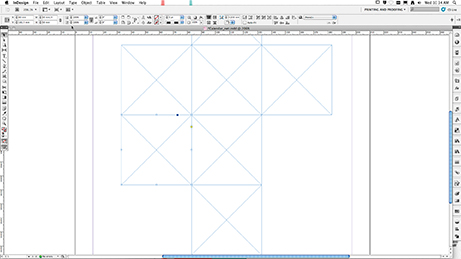
Use the Direct Selection tool to select the height-left betoken of the tab rectangle, and affix the + symbol followed by your width measurement (for example: +12.five) to the stop of the measurement in the Y text field. This moves the point to create a 45° angle. Echo the process at the bottom on the tab using – instead of +.
Step 05
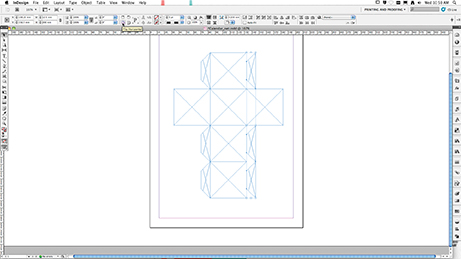
Use the Selection tool and hitting Cmd/Ctrl+Opt/Alt+Shift to duplicate and place all the tabs downwardly the left side of the cube cyberspace. Select all three tabs and use Cmd/Ctrl+Opt/Alt+Shift to duplicate, aligning them to the right side of the net. Select the central point on the Reference Point tool and use the Flip Horizontal tool in the Application bar and then they confront the right way. Duplicate i concluding tab, and utilize the 90° Rotation push to align information technology with the bottom border of the cyberspace.
Footstep 06

Open the Layers console and name your layer 'cube net'. Create a new layer naming it 'design' and copy (Cmd/Ctrl+C) and paste in place (Cmd/Ctrl+Opt/Alt+Shift+V) just the half-dozen faces of the cube onto the new layer. Now lock the layer. The new layer volition exist used afterward for calculation the design elements you want to the faces of your cube.
Footstep 07
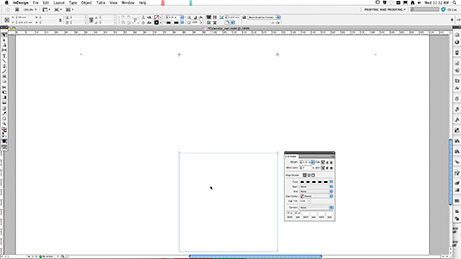
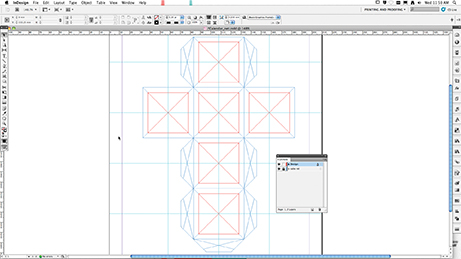
Now to add some print markers. Render to the original cube cyberspace layer and select the six faces of the cube. Open the Stroke palette and use a 0.25pt stroke, Select Dashed from the Type drop-down carte du jour and select Adjust Dashes from the Corners drib-down menu.
In the dashes and gaps text field at the bottom of the box, enter 10pt in the first dash field and 40pt in the first gap field. Turn to screen preview manner to check your impress markers are correct.
Step 08

Select all the tabs and echo the process. With the Direct Choice tool, select the internal frame edges of the tabs and delete them – this is to reduce the number of markers that will be printed, getting rid of the ones you won't need.
Step 09
Return to the design layer, locking the cube net layer. At present yous can kickoff calculation your design elements to the cube. To create a alive text guide, reduce the elevation and width of each of the frames you duplicated earlier by 10mm, making sure the central reference betoken is selected. You can also add a ruler guide to mark the centre of each cube face to help line upwardly the blueprint elements.
Pace 10
In the Pages panel duplicate the page three times; on each of the pages add together the design elements for each of the cubes, referring dorsum to your plan. When y'all take placed and kerned all the re-create, I discover it best to brand the text into outlines (Cmd/Ctrl+Shift+O) – this makes it much easier when placing the elements and finessing your blueprint. Use the Align panel to make sure everything is placed in the correct position.
Step 11
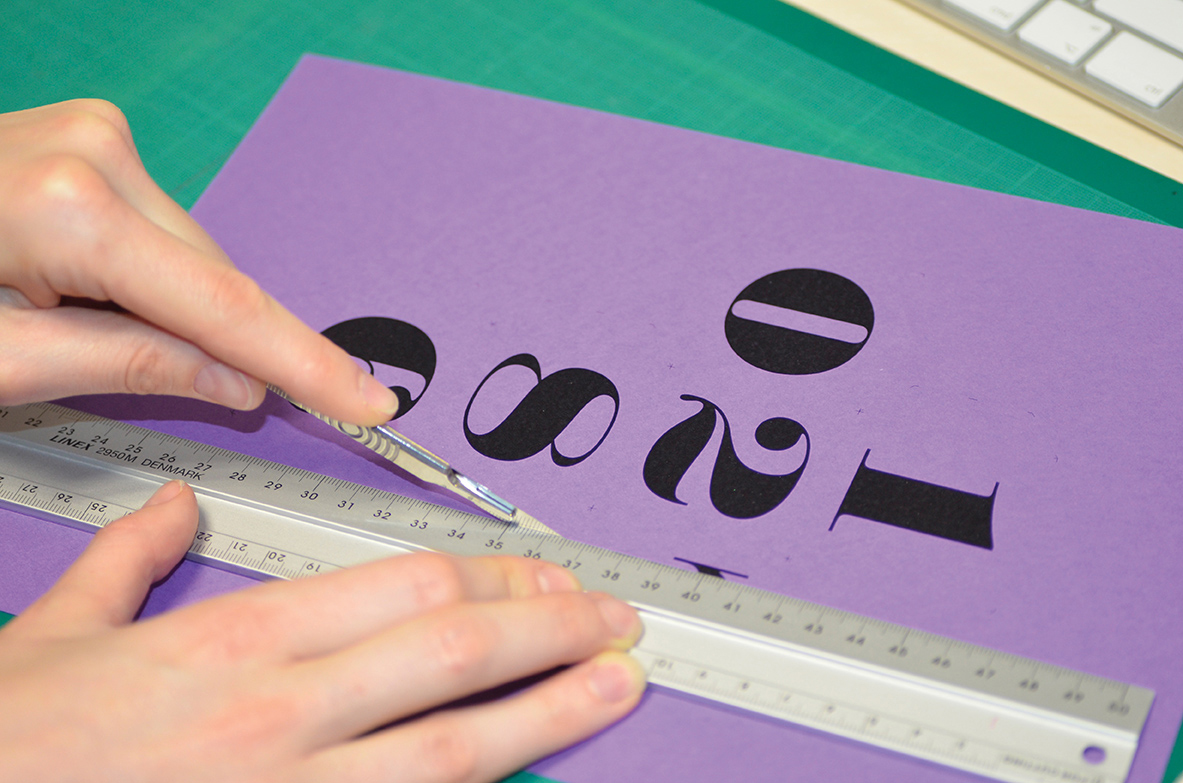
When everything is designed, y'all're gear up to print and get together your calendar. Impress at 100% on coloured card, and use the impress markers for cut and scoring your concluding calendar.
Related articles:
- How to build an app: endeavor these nifty tutorials
- Gratuitous graphic blueprint software available to you right now!
- Download the best gratuitous fonts
Related articles
Source: https://www.creativebloq.com/3d/create-3d-calendar-indesign-6127988
0 Response to "how to draw a 3d box in indesign"
ارسال یک نظر